Welcome to the fourth article in a series dedicated to my journey in Home Theatre centred around my personal Home Theatre. A list of all articles in the series is below:
Introduction, Background & Hobby – The Introduction to Home Theatre
Training and Leveling Up
The UK Revolution – The Next Step
Design, Modelling & Specification
Physical Installation
Final Photos and Future Upgrades
Design – A Blank Canvas
This article will be a bit more technical to explain some of the technical design considerations in Home Theatre design, specifically relating to my Home Theatre. For reference, my room’s dimensions are 6.68m x 4.57m x 2.58m
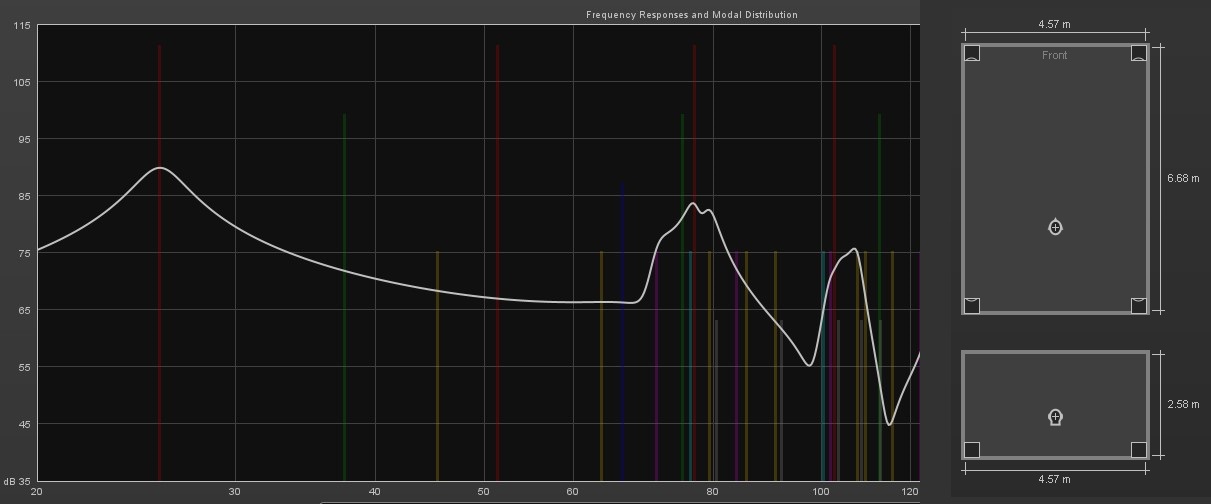
Room Modal Response
One of the biggest challenges in a room design is ensuring great seat-to-seat consistency across the entire listing area because low frequencies in small rooms interact with the room’s boundaries and can cancel or reinforce each other at specific frequencies. Our starting point is to model the room to determine where those frequencies are and how to avoid placing our seats there. We also optimize subwoofer quantity and placement during this analysis step. In my case, I designed to install four subwoofers to eliminate some modal issues in the room.
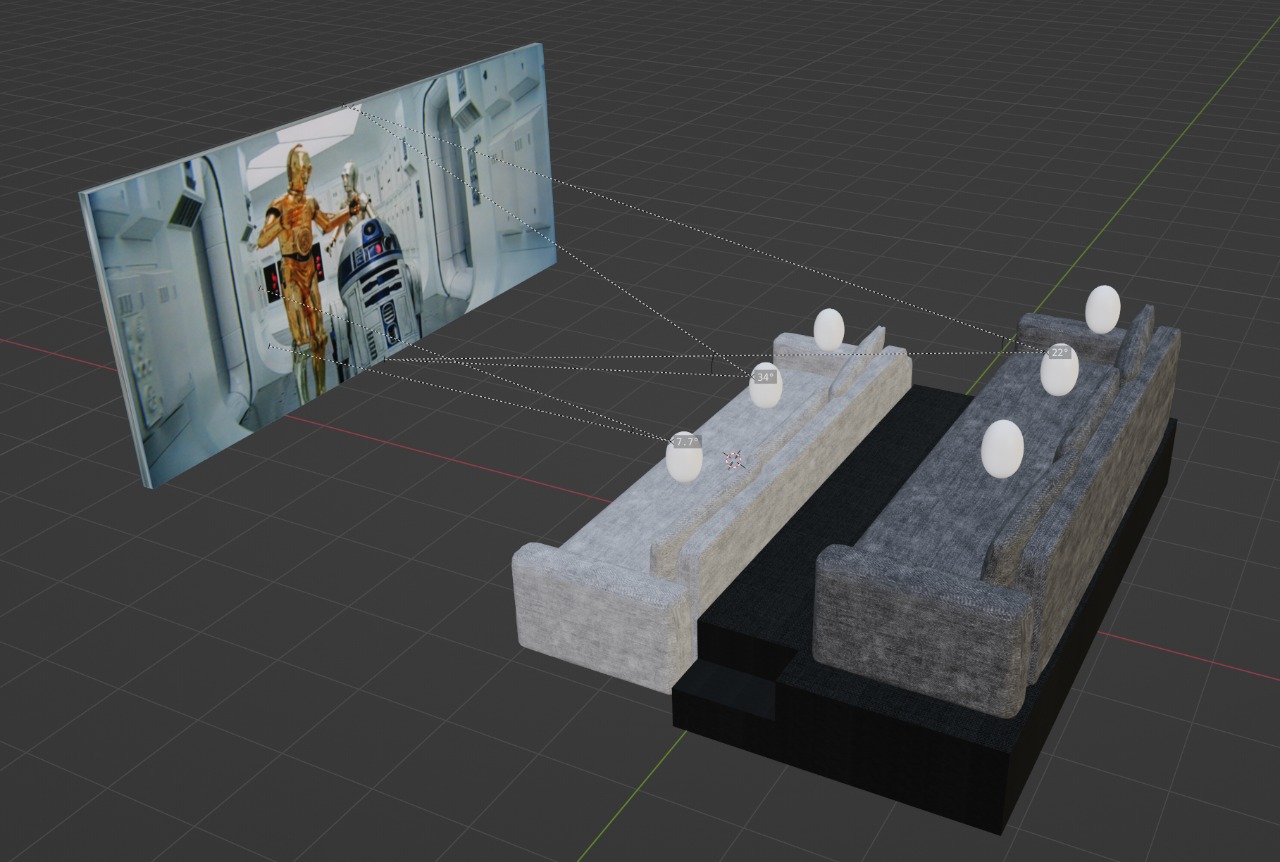
Seating – Riser & Sight Lines
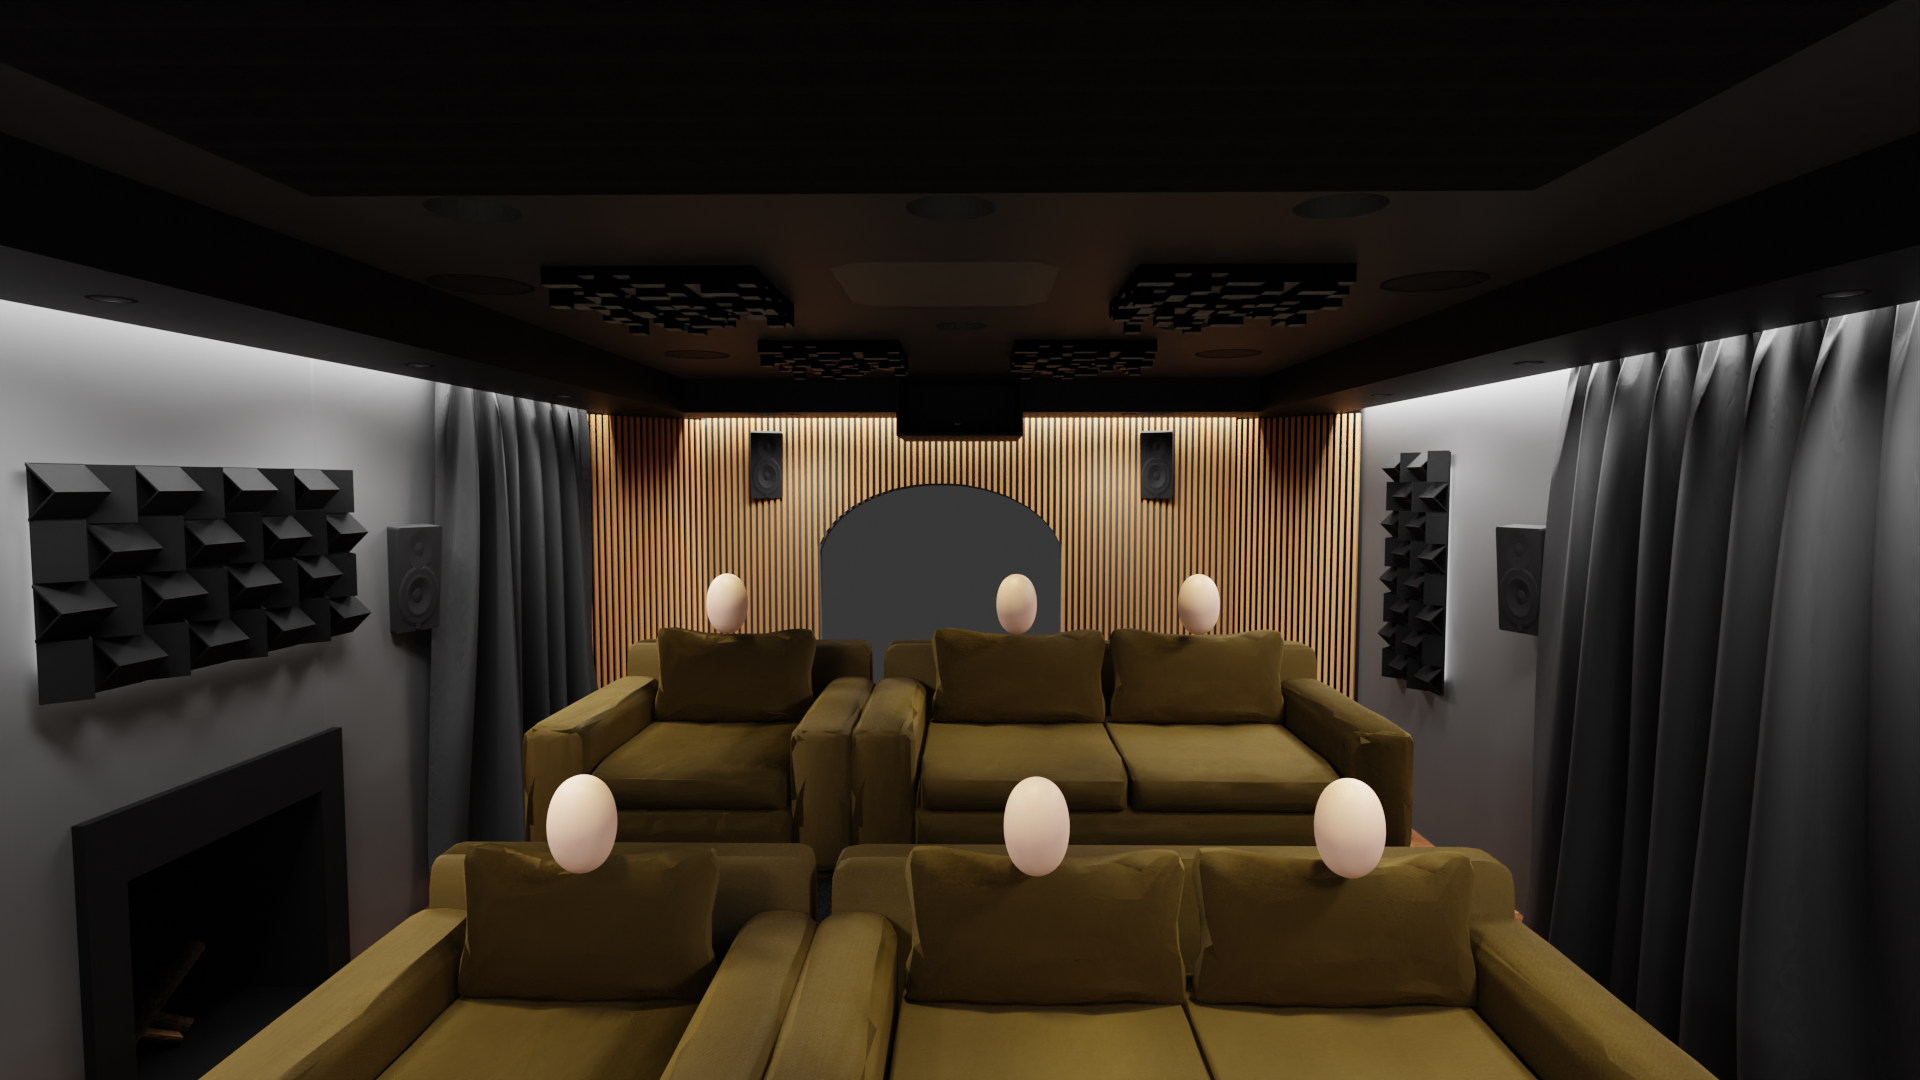
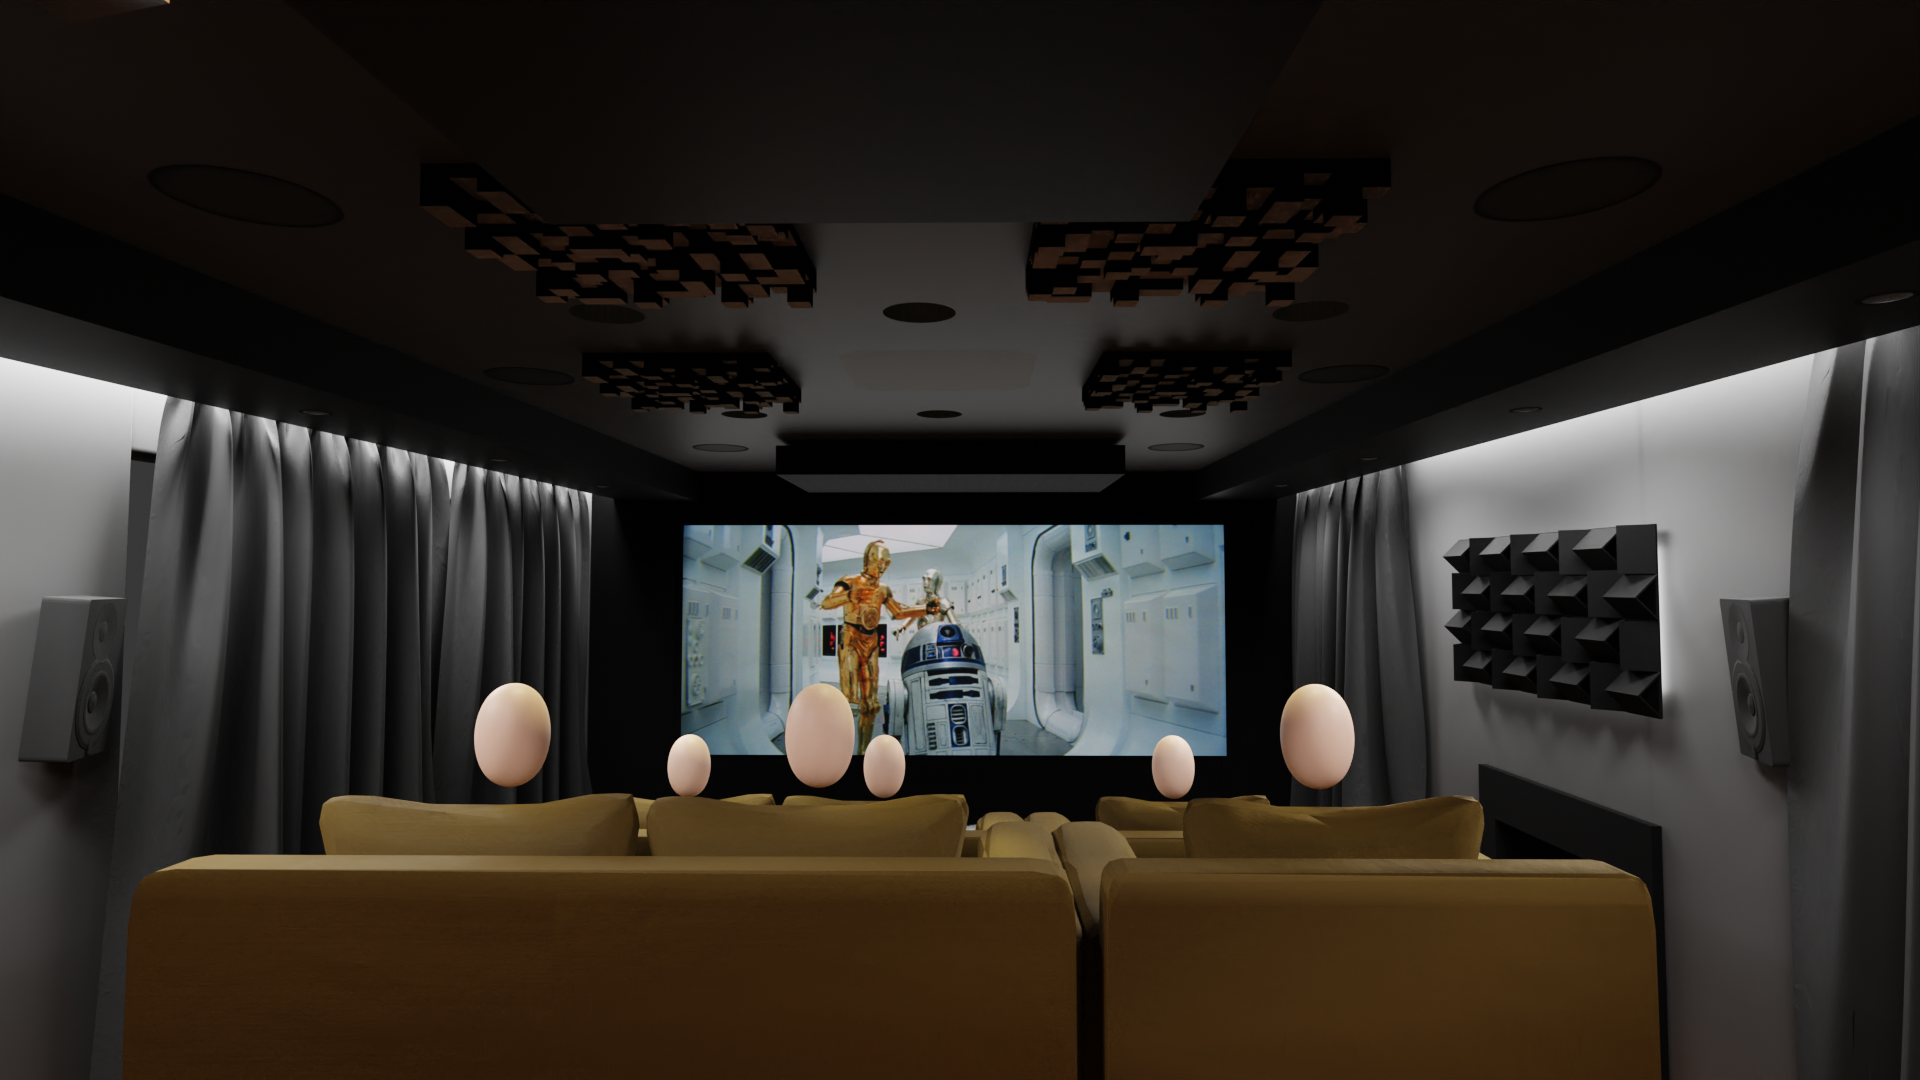
With the optimal seating location determined, we must decide on an immersive screen size and ensure all viewers have an unobstructed view of the screen. The former can be a tricky balancing act due to the light output requirement of projection systems on large screens. However, there are guidelines on how large a screen should be. I will predominantly be watching movies in my room, so a cinemascope screen makes the most sense. Size-wise, SIMPTE recommends a 30-degree viewing angle and THX 40 degrees. In my experience, a larger screen provides more immersion, so I designed to go with a 3.6m wide 2.37 aspect ratio acoustically transparent screen. One can then work out the sight lines to determine how high the riser should be as well as the projector light output requirement (read more here).
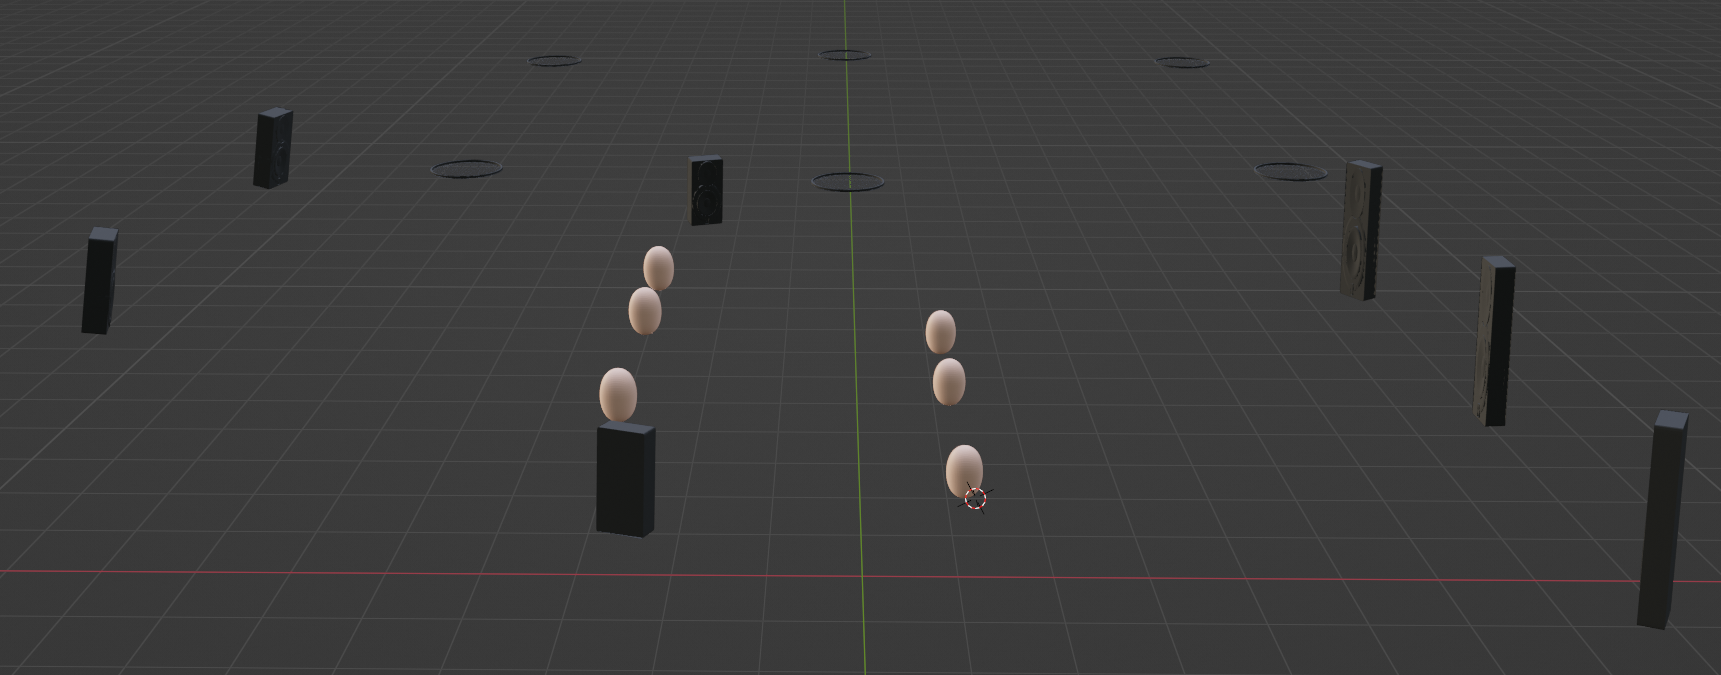
Speaker Layout & Requirements
CEDIA’s Recommended Practice for Level 3 (reference) Rooms recommends a minimum of 15 discrete channels. I knew this was unachievable for my room, so I opted to strive for Level 3 rather than design for it. I ended up with a 7.1(4).6 speaker layout, with the front row as the Main Listening Position. For a level 3 room, CEDIA recommends screen speakers capable of 105db output, 102db for the non-screen speakers and 115db for the subwoofers at the Main Listening Position. Sitting 2.5m from the screen speakers, and knowing I’d like to utilize Wisdom Audio speakers in my home theatre, the P4m matches the screen speaker recommendation, and the P2m matches the other speaker recommendation. The same holds true for the iCS7a speakers for Atmos and the S90i / Velodyne combination for the subwoofers.
Room Acoustics – Treatment & Isolation
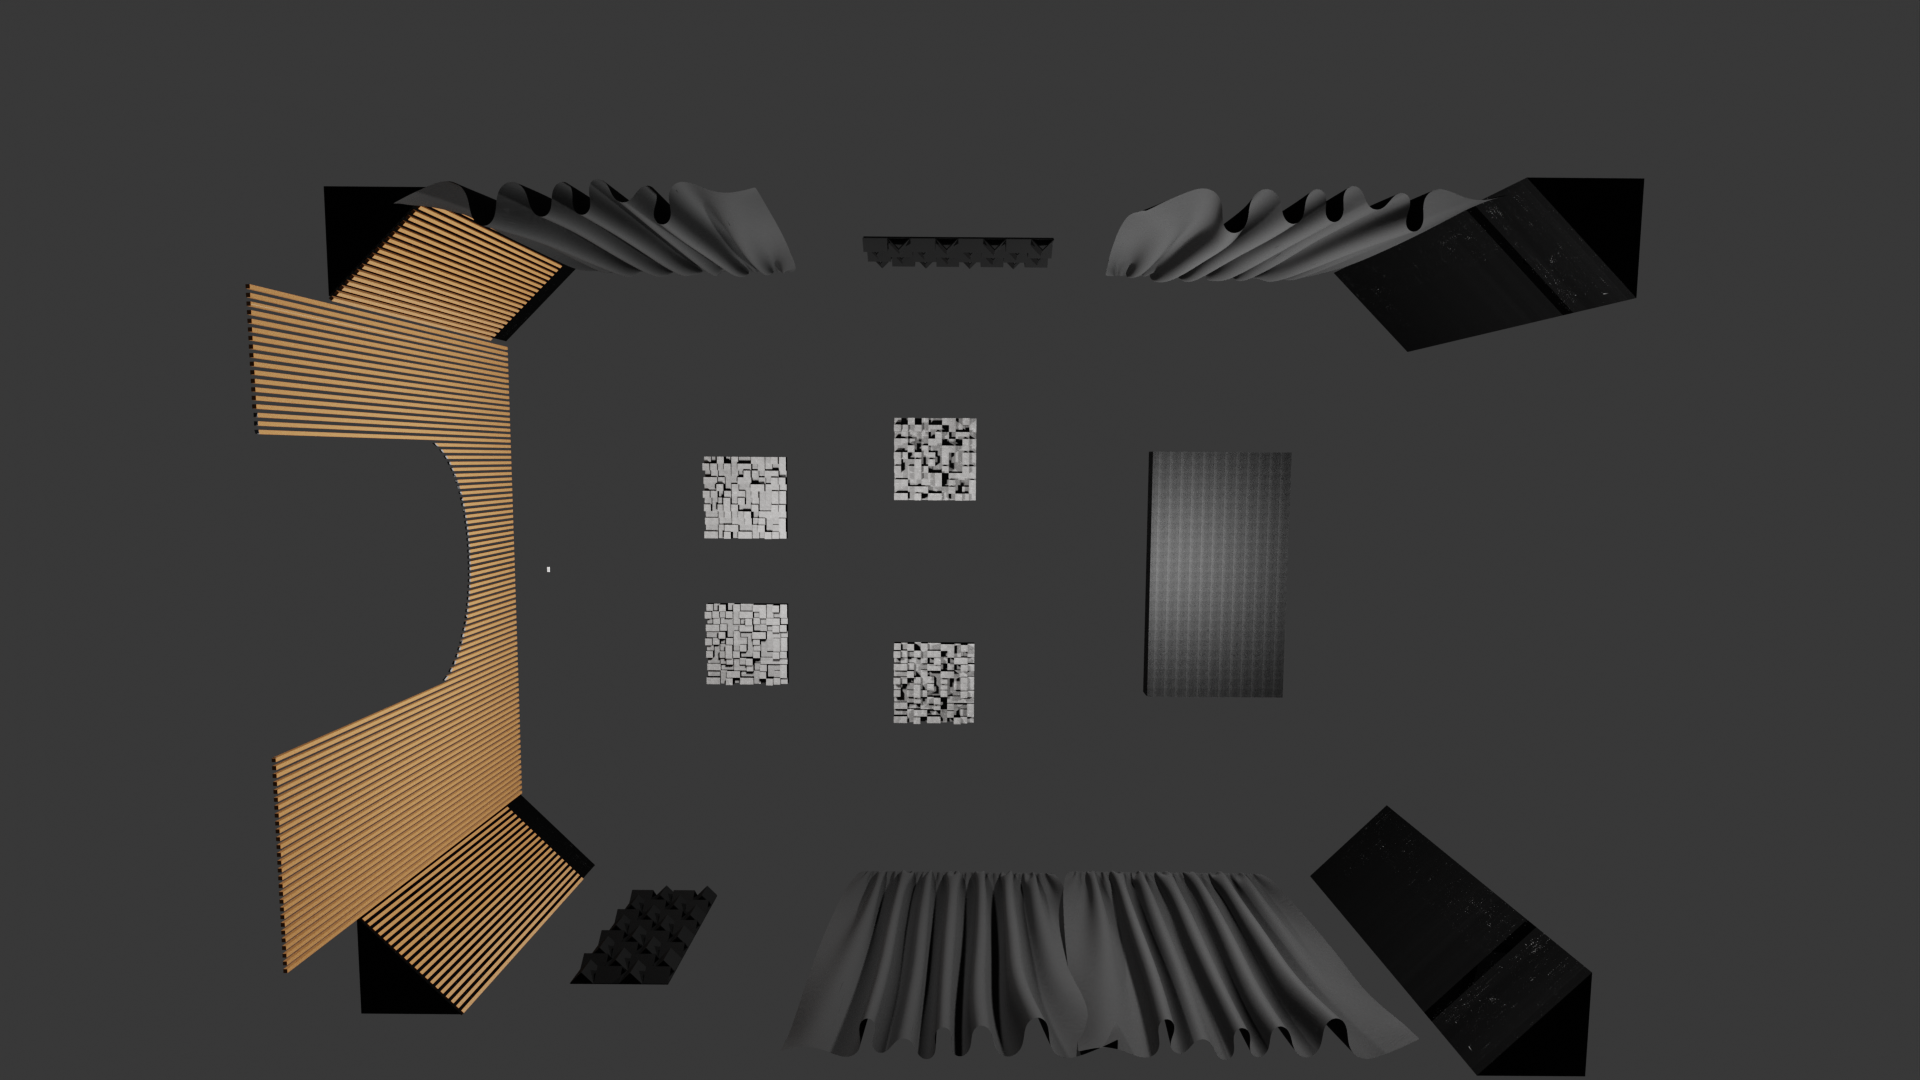
The general rule of thumb for room treatment for home theatre is to provide absorption in the front of the room and diffusion in the rear and to target a Reflection Decay time of between 200 and 300ms. I designed four low-frequency absorbers for the corners of my room, a baffle wall for the front three speakers to assist with SBIR, an absorption panel on the ceiling to absorb first-order ceiling reflections from the screen speakers, a rear wooden feature diffusion wall to match the wooden doors as well as two diffusion panels for the side walls. Apart from sealing the windows and door properly, I was unable to do anything in my room regarding sound isolation.
Dynamic Range Considerations
To maximize the dynamic range of the room, you must eliminate as much noise from inside and outside the room as possible. As explained above, I was unable to isolate the room from the outside, so minimizing the amount of noise on the inside was important. For this reason, I designed to install the electronic equipment outside of the room, place the projector in a box with absorption material and replace the air conditioning with a ducted solution.
Other Considerations
Because the equipment will be located on the outside of the room, a unified control solution is required. I settled on Control4 with their Touch Screen remote. This remote will also be used to control the various lighting zones for general, task, accent and path lights.
Power is also an important consideration for a Home Theatre. In my situation, I have a whole home battery backup and solar solution and provide three dedicated 20A feeds for the entire home theatre to ensure the equipment receives the most pure power possible.
I hope this provides some insight into the design process. In the next article, we’ll explore the installation.